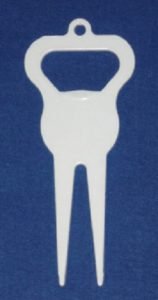
A golf divot tool is an essential piece of equipment for any golfer who wants to maintain the quality of the course and ensure a smooth and even putting surface. The tool is used to repair the damage caused by golfers’ swings, which can create small depressions or divots on the grass.
Find the right club for your game
Answer 4 quick questions — get a personalised recommendation with the best price on Amazon
Free — no signup Takes 20 seconds No ads or bias
Here are the steps on how to use a golf divot tool:
- Approach the divot: As you walk towards your ball, be on the lookout for any divots in your path. Once you arrive at your ball, take a quick look at the putting surface around it to see if any divots need to be repaired.
- Place the tool: Hold the tool with the prongs facing downwards and insert it into the turf just outside the edge of the divot. Then push the tool handle towards the divot, creating a slight lever effect.
- Lift the turf: Gently push the handle forward to lift the damaged turf, being careful not to pry too hard or too deep. You only want to lift the damaged turf, not the healthy grass around it.
- Cut the turf: Use the prongs on the tool to cut the lifted turf at the base. This will remove the damaged section from the surrounding grass.
- Replace the turf: Once the damaged turf has been removed, gently press the surrounding grass around the divot with your foot to level it. Then, use the prongs on the tool to tamp down the lifted turf until it’s level with the rest of the putting surface.
Additional Tips:
Here are some additional tips to keep in mind when using a golf divot tool:
- Use the right tool: There are different types of golf divot tools available, so make sure to use one that is suitable for the type of grass on the course. For example, some tools are designed for use on Bermuda grass, while others work better on bentgrass.
- Repair divots as soon as possible: The longer a divot goes unrepaired, the harder it is to fix. It’s best to repair divots as soon as you notice them to ensure the best possible result.
- Don’t overdo it: It’s important not to lift too much turf when repairing a divot, as this can damage the roots of the surrounding grass. Aim to lift just enough to remove the damaged section and no more.
- Follow course guidelines: Some courses have specific guidelines for repairing divots, so be sure to follow them if they are provided. For example, some courses may ask that you use a specific type of divot tool or only repair divots on the putting surface, not in other areas of the course.
- Thank others: If you notice someone else repairing a divot, be sure to thank them. Divot repair is a communal effort, and showing appreciation for others’ efforts can help encourage good habits and a sense of community on the course.
- Work from the outside in: When repairing a divot, it’s best to work from the outside in, using the prongs on the tool to gently lift the damaged turf and work your way towards the center. This will help prevent the divot from becoming larger or deeper than necessary.
- Use a gentle touch: When repairing a divot, it’s important to use a gentle touch to avoid causing further damage to the grass. Use the prongs on the tool to lift the turf slowly and carefully, and avoid prying or pulling too hard.
- Fill in the divot: In some cases, you may need to add some soil or grass seed to fill in a divot. If this is the case, use a small amount of soil or seed to fill the hole, and gently pat it down with your hand or the prongs on the tool.
- Be consistent: To ensure that the putting surface remains smooth and even, it’s important to repair divots consistently throughout your round. Try to repair any divots you come across as soon as possible, and make divot repair a regular part of your golfing routine.
- Maintain your tools: Over time, golf divot tools can become dull or damaged, making them less effective at repairing divots. To ensure that your tool is always in top condition, clean it regularly and replace it if it becomes worn or damaged.
Basic Steps for Using a Golf Divot Tool
| Step | Description | Tool Position | Tool Angle | Action |
|---|---|---|---|---|
| 1 | Approach the divot on the green | Place the tool near the divot | Tool should be perpendicular to the ground | Press the prongs into the ground |
| 2 | Push the tool forward | Move the tool along the length of the divot | Tool should be at the same angle as the divot | Close the prongs and lift the turf |
| 3 | Use the prongs to lift the edges of the divot | Position the prongs underneath the edges | Tool should be at a slight angle | Gently lift the edges of the divot |
| 4 | Push the turf back into place | Use the tool to press the edges back down | Tool should be flat against the ground | Firmly press the turf back into place |
| 5 | Repeat as needed | Move on to the next divot | – | – |
Common Mistakes to Avoid When Using a Golf Divot Tool
| Mistake | Description | How to Avoid |
|---|---|---|
| Pushing too hard | Exerting too much pressure can damage the green | Use a light touch and only apply enough pressure to lift the turf |
| Using the wrong angle | Holding the tool at the wrong angle can make it difficult to lift the turf properly | Make sure the tool is positioned correctly before pressing down |
| Not using the tool at all | Some golfers don’t realize the importance of using a divot tool | Remember to always use a divot tool and encourage others to do the same |
| Not repairing divots in a timely manner | Leaving divots un-repaired can cause long-term damage to the green | Repair divots as soon as possible to ensure the green remains healthy |
| Not knowing how to use the tool | Using a divot tool incorrectly can cause more harm than good | Learn how to use the tool properly before attempting to repair divots |
Benefits of Using a Golf Divot Tool
| Benefit | Description |
|---|---|
| Helps maintain the health of the green | Repairing divots ensures the green remains healthy and free of damage |
| Enhances the overall appearance of the course | A well-maintained course with few divots is more attractive to players |
| Helps golfers save money | A damaged green may require expensive repairs |
| Improves playing conditions | A smooth, even green makes for better putting and overall playability |
| Demonstrates respect for the course and other players | Repairing divots shows respect for the course and other golfers who will play after you |
Types of Golf Divot Tools
| Type | Description |
|---|---|
| Fork-style divot tool | The most common type of divot tool, with two prongs that are used to lift the edges of the divot |
| Push-style divot tool | A flat, circular tool that is used to push the turf back into place without lifting it |
| Hybrid divot tool | Combines features of the fork-style and push-style tools |
| Bottle-opener divot tool | Includes a bottle opener in addition to the divot repair function |
| Magnetic divot tool | Uses a magnet to hold a ball marker in place on the tool |
By following these tips and using your golf divot tool effectively, you can help maintain the quality of the course and ensure that it remains enjoyable for all golfers.